Build a Before/After Frame Strip From a Short Video With FFmpeg
Pick exact timestamps, keep aspect ratio, add labels, and avoid sensitive frames in thumbnails.
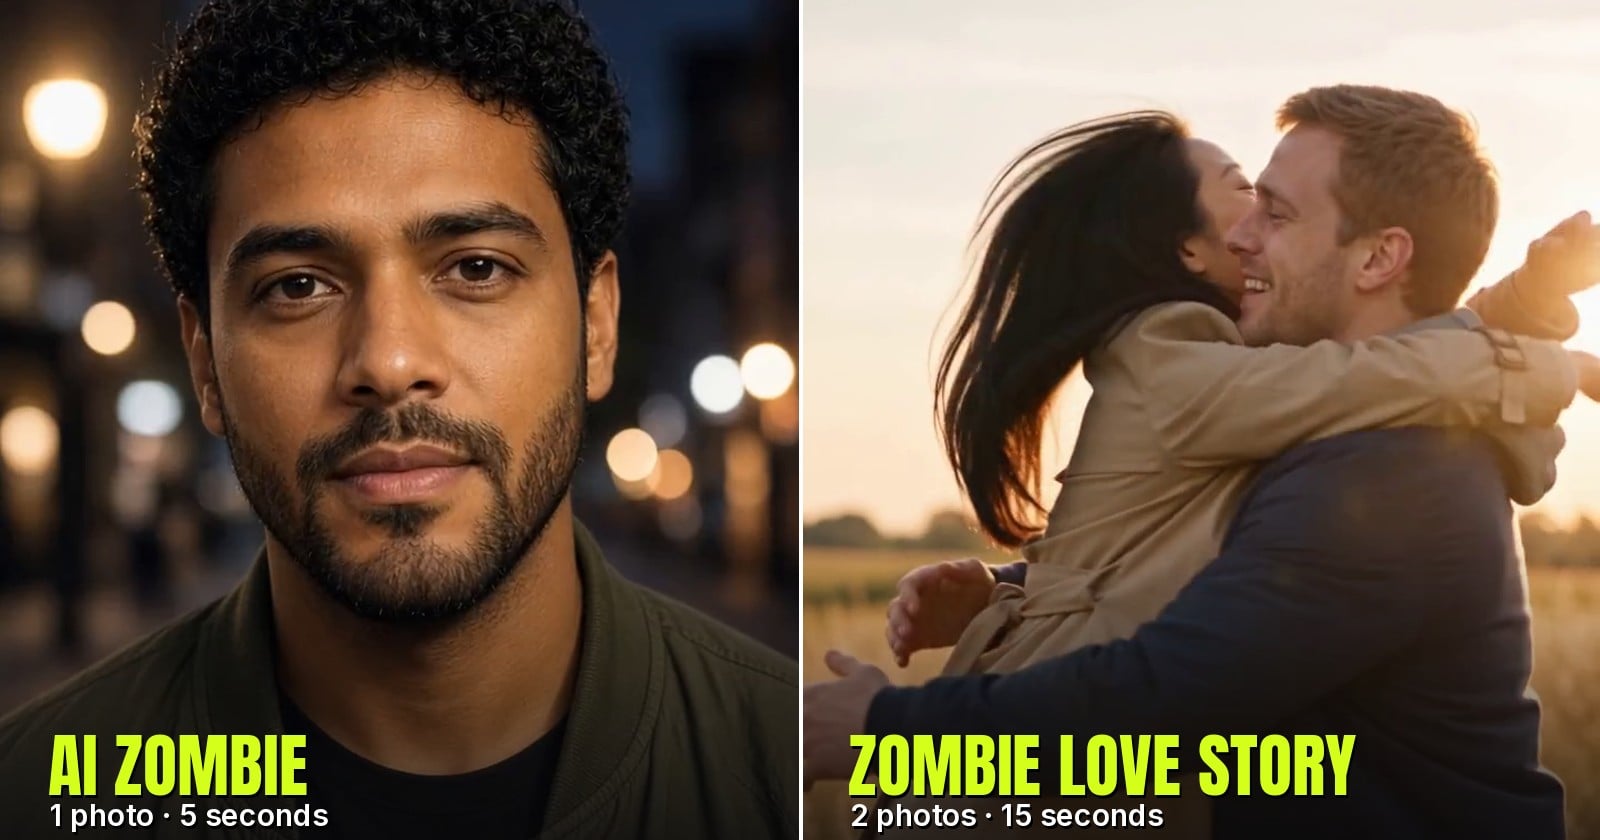
Short transformation clips are hard to show in places that only take images: a blog post, a README, a newsletter, an Open Graph card. A frame strip solves it: three or four frames side by side, taken at chosen timestamps, so a reader sees the change without pressing play.
This tutorial builds one with FFmpeg only. It works for any short clip; the examples use a 15-second vertical video.
1. Inspect the clip first
You need the duration, frame rate and size before you choose timestamps.
ffprobe -v error \
  -show_entries stream=width,height,r_frame_rate \
  -show_entries format=duration \
  -of compact input.mp4
Typical output for a phone-style clip:
stream|width=720|height=1280|r_frame_rate=24/1
format|duration=15.070000
At 24 fps, any timestamp you pick lands within about 42 ms of a real frame, which is precise enough for a strip.
2. Grab single frames with fast, accurate seeking
Putting -ss before -i seeks on the input. Modern FFmpeg decodes from the previous keyframe up to your timestamp, so the result is both fast and frame-accurate.
for t in 10.75 11.75 14.5; do
  ffmpeg -v error -y -ss "$t" -i input.mp4 \
    -frames:v 1 -q:v 2 "frame_$t.jpg"
done
-q:v 2 keeps JPEG quality high. Use .png if you will edit the frames further.
3. Stack them in one command
You can skip the temporary files. Open the same input three times, each with its own seek, and stack the first frame of each:
ffmpeg -v error -y \
  -ss 10.75 -i input.mp4 \
  -ss 11.75 -i input.mp4 \
  -ss 14.5  -i input.mp4 \
  -filter_complex "
    [0:v]trim=end_frame=1,scale=-2:900[a];
    [1:v]trim=end_frame=1,scale=-2:900[b];
    [2:v]trim=end_frame=1,scale=-2:900[c];
    [a][b][c]hstack=inputs=3[s]" \
  -map "[s]" -frames:v 1 strip.jpg
trim=end_frame=1 keeps one frame per input. scale=-2:900 sets a shared height and keeps the width even, which hstack and most encoders want. Three 9:16 frames at 900 px tall give a strip about 1518 px wide.
4. Fit it to a fixed canvas
Blogs and social cards prefer fixed sizes such as 1600x900. Pad instead of stretching:
ffmpeg -v error -y -i strip.jpg -vf "
  scale=1600:900:force_original_aspect_ratio=decrease,
  pad=1600:900:(ow-iw)/2:(oh-ih)/2:color=0x111111" \
  strip_1600x900.jpg
5. Add labels
drawtext needs a font file on most systems. Label each panel before stacking so the text stays aligned:
FONT=/System/Library/Fonts/Supplemental/Arial Bold.ttf
ffmpeg -v error -y -ss 10.75 -i input.mp4 -frames:v 1 -vf "
  scale=-2:900,
  drawtext=fontfile='$FONT':text='10.75 s':
  x=24:y=h-th-24:fontsize=40:fontcolor=white:
  box=1:boxcolor=black@0.55:boxborderw=12" \
  label_a.png
On Linux, point FONT at a file from fc-list, for example a Noto Sans path.
6. Keep sensitive frames out of thumbnails
Transformation clips often change tone halfway: a horror effect adds blood makeup, an action template shows a prop weapon. Platforms treat the thumbnail more strictly than the video, so choose frames on purpose:
- Use the first frame when the change happens later, for example 0.2 s, before anything starts.
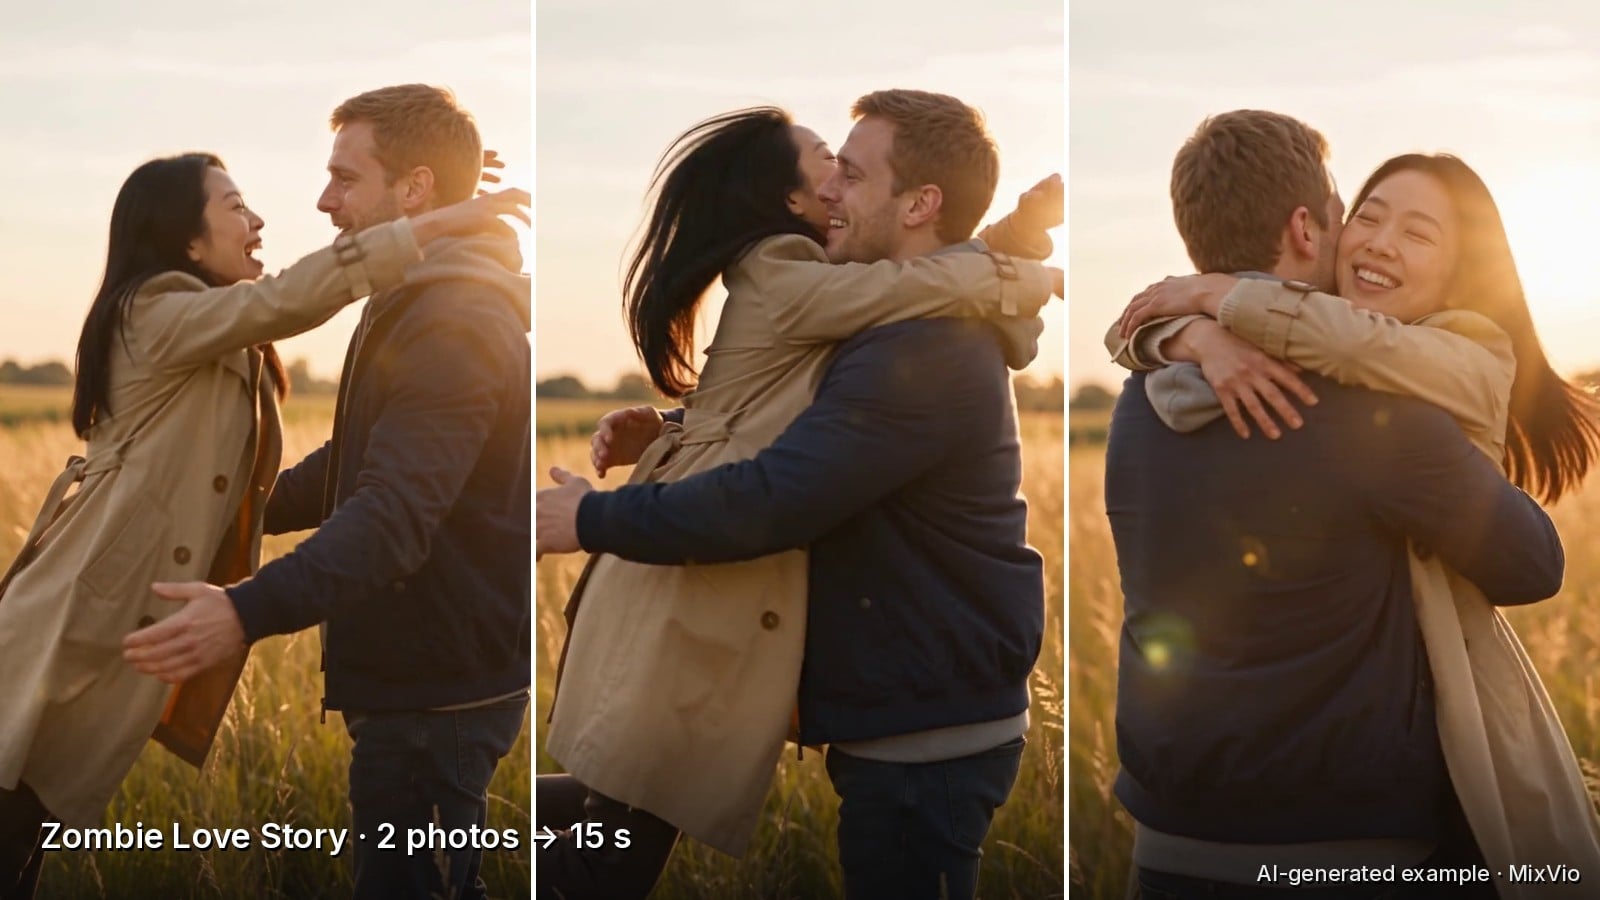
- Use the resolution frame for story clips, such as the final hug after a twist.
- Write the chosen timestamps down next to the asset so the next export uses the same frames.
The image below is a strip built with the commands above, from the last five seconds of a 15-second story clip (10.75 s, 11.75 s, 14.5 s).
7. Check the result
ffprobe -v error -show_entries stream=width,height \
  -of csv=p=0 strip_1600x900.jpg
# 1600,900
Open it at 100 % once. JPEG artefacts around text are the most common problem; raise quality with -q:v 1 or export PNG.
Wrap-up
The full recipe is: probe, pick timestamps, stack with trim and hstack, pad to a fixed canvas, label, and check. Everything runs in a shell script, so a whole folder of clips can get strips in one pass.
The example clip is an AI-generated preview from the Zombie Love Story effect on MixVio, which we build.