Limit True Peak to -1 dBTP with ffmpeg Before Uploading
Measure with ebur128, resample to 48 kHz and oversample a limiter so social platforms don't clip your clip.
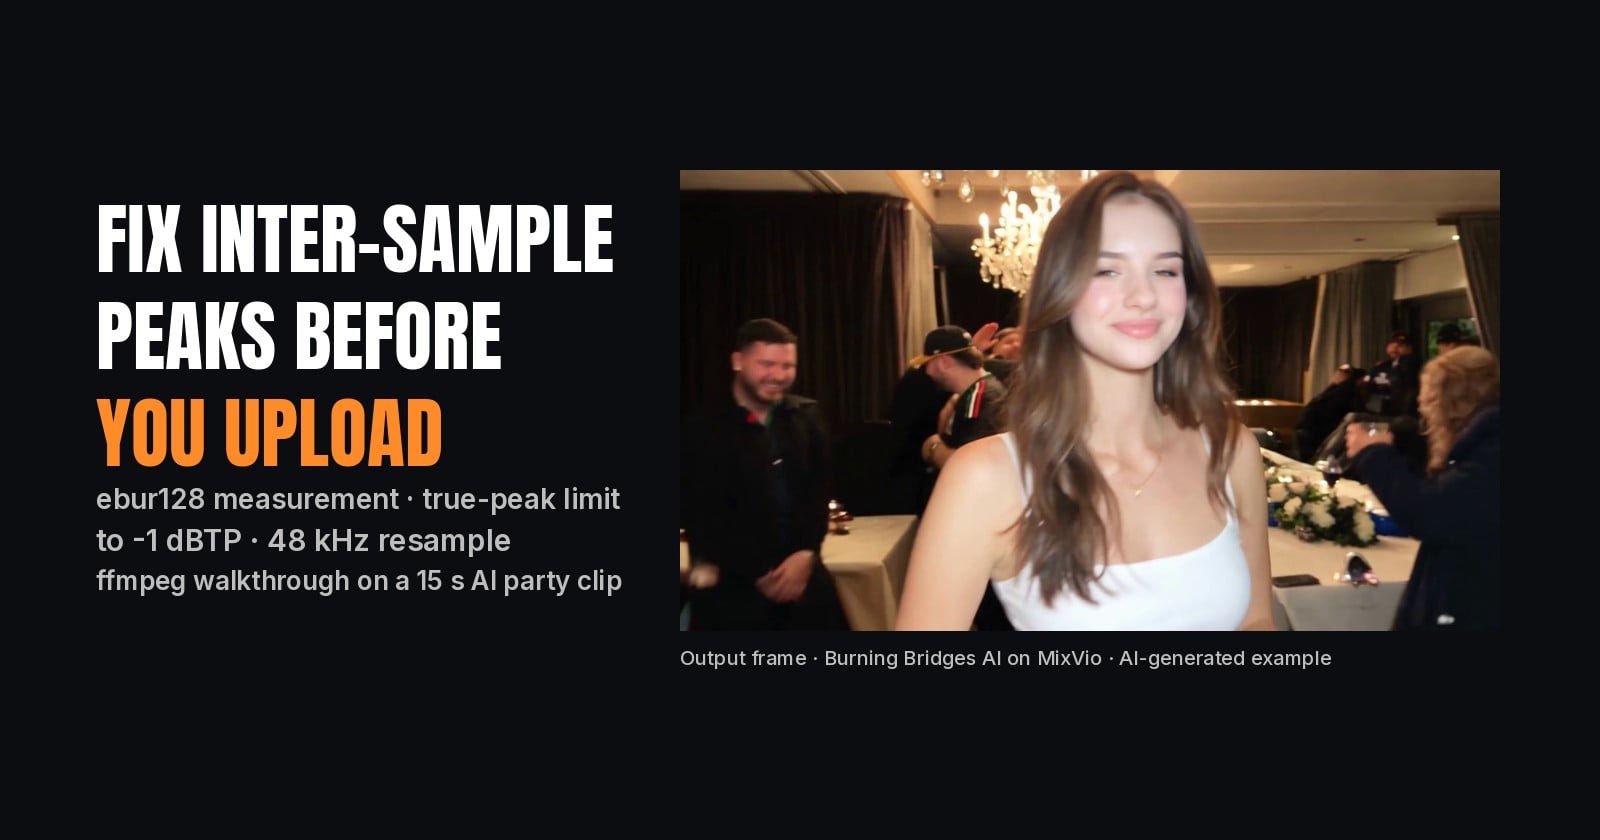
AI-generated example made with MixVio's Burning Bridges AI effect. The lead is an AI-generated portrait, not a real person.
A clip can look fine in your editor and still clip after upload. Social platforms re-encode audio, and a file whose waveform already touches 0 dBFS often has inter-sample peaks above 0 dB once it is reconstructed or transcoded. You hear that as harsh distortion on the loudest beats.
This tutorial shows an ffmpeg true peak limit workflow I used on a 15-second AI party clip: measure with ebur128, resample to 48 kHz, take off a little gain, and run an oversampled limiter so the result sits at or below -1 dBTP. Everything here is about levels only. It says nothing about music rights, which are a separate question.
The example file
The example clip was made with Burning Bridges AI on MixVio: a 15-second 1280x720 video whose effect attaches the original source track after the visual edit. As delivered, its audio was 44.1 kHz stereo, about -12.6 LUFS integrated, with peaks at +1.1 dBFS, so the source track was already clipping before any platform touched it.
That makes it a good test case: we want to fix the peaks without changing the music, the timing or the video.
Step 1: measure integrated loudness and true peak
ebur128 with peak=true reports EBU R128 loudness and a 4x oversampled true-peak value:
ffmpeg -hide_banner -nostats -i in.mp4 \
  -af ebur128=peak=true -f null - 2>&1 | grep -E "I:|Peak:"
On the example clip:
I:         -12.6 LUFS
Peak:        1.1 dBFS
The Peak line in the true-peak section is the number to watch. Anything above about -1 dBTP is likely to clip after a lossy re-encode. Most platforms also normalise playback to around -14 LUFS, so a -12.6 LUFS file will simply be turned down; there is little to gain from leaving it that loud.
Step 2: understand why the sample peak lies
A sample peak only looks at the stored samples. Between two samples the reconstructed analog waveform can rise higher, especially on bright, dense mixes. AAC and Opus encoders work on that reconstructed signal, so a file with sample peaks at -0.1 dBFS can still produce encoded peaks above 0 dB.
True-peak meters estimate this by oversampling (4x here) before taking the maximum. That is why you should limit at a higher sample rate too: a limiter that only sees 48 kHz samples cannot catch overs it does not see.
Step 3: resample, trim gain, oversample and limit
This keeps the video stream untouched (-c:v copy) and only rebuilds the audio:
ffmpeg -i in.mp4 -c:v copy \
  -af "aresample=48000:resampler=soxr,volume=-1.6dB,\
aresample=192000,alimiter=limit=0.84:level=disabled,\
aresample=48000" \
  -c:a aac -b:a 192k out.mp4
What each part does:
aresample=48000:resampler=soxrconverts 44.1 kHz to 48 kHz, the rate most video platforms expect, with the high-quality SoX resampler.volume=-1.6dBbrings the integrated loudness close to -14 LUFS. This is plain gain; it does not change the mix.aresample=192000upsamples 4x so the limiter can see inter-sample overs.alimiter=limit=0.84:level=disabledcaps the signal at about -1.5 dBFS (0.84 linear).level=disabledstops alimiter from re-normalising the output back up.aresample=48000returns to the delivery rate.-c:a aac -b:a 192kencodes AAC at a bitrate that leaves headroom for the next encode.
Step 4: measure again
Run the same ebur128 command on out.mp4:
I:         -14.2 LUFS
Peak:       -1.9 dBFS
Integrated loudness moved by the gain change only, and the true peak is now below -1 dBTP. A quick check that the format is what the platform expects:
ffprobe -v error -select_streams a \
  -show_entries stream=sample_rate,channels -of csv=p=0 out.mp4
# 48000,2
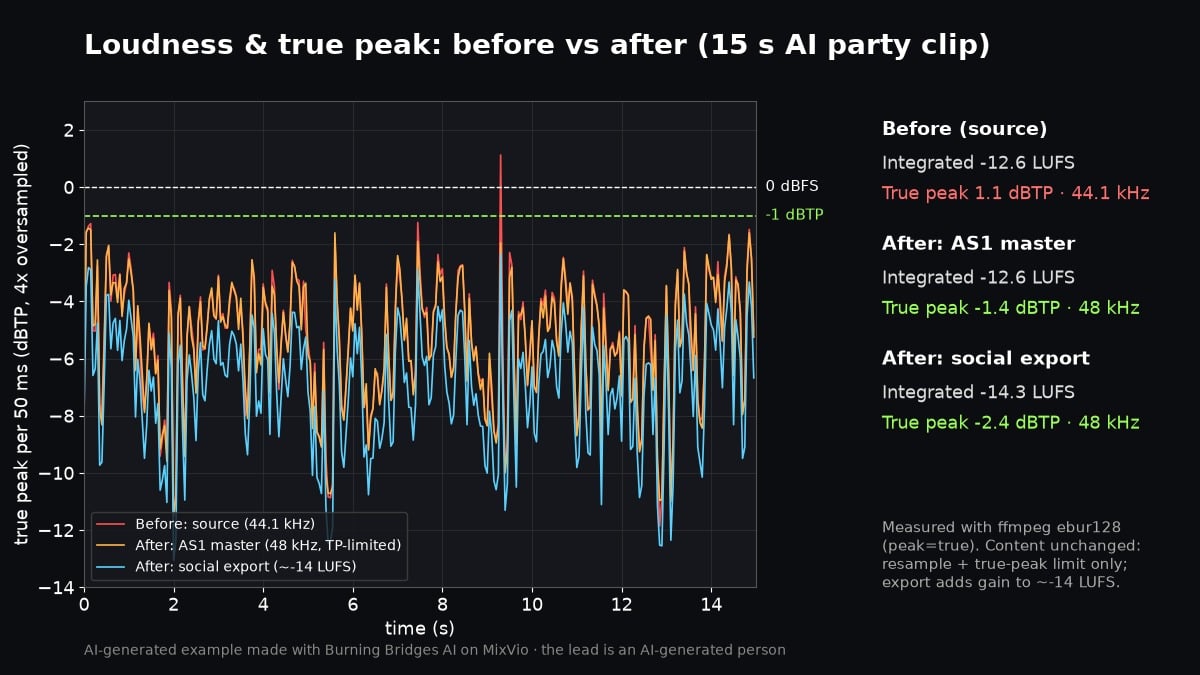
True peak over time for the source (44.1 kHz), the 48 kHz master and the social export. Chart from ffmpeg ebur128 measurements; the final social export measured -14.3 LUFS and -2.4 dBTP.
The chart comes from a slightly different export of the same chain, which is why its numbers differ from my run by a few tenths of a dB. Both sit well under the -1 dBTP line.
Alternative: two-pass loudnorm
If you would rather target loudness directly, loudnorm can do both jobs. Run it once to measure:
ffmpeg -hide_banner -i in.mp4 \
  -af loudnorm=I=-14:TP=-1.5:LRA=11:print_format=summary \
  -f null -
Then feed the measured values back in a second pass with measured_I, measured_TP, measured_LRA, measured_thresh and linear=true. Linear mode applies a single gain where it can, which keeps the dynamics of a music track intact. If the target would push peaks over the ceiling, loudnorm falls back to dynamic mode, so always re-measure.
For short clips that are already loud, the explicit chain in Step 3 is easier to reason about: one gain value, one limiter, nothing adaptive.
Batch it
A tiny shell loop applies the same chain to a folder of exports and prints the result for each file:
#!/usr/bin/env bash
set -euo pipefail
AF="aresample=48000:resampler=soxr,volume=-1.6dB"
AF="$AF,aresample=192000,alimiter=limit=0.84:level=disabled"
AF="$AF,aresample=48000"
mkdir -p fixed
for f in exports/*.mp4; do
  out="fixed/$(basename "$f")"
  ffmpeg -nostdin -loglevel error -y -i "$f" -c:v copy \
    -af "$AF" -c:a aac -b:a 192k "$out"
  printf '%s ' "$out"
  ffmpeg -hide_banner -nostats -i "$out" -af ebur128=peak=true \
    -f null - 2>&1 | grep -E "Peak:" | tail -n 1
done
Adjust volume per file if your sources differ a lot in loudness; the limiter is there to catch peaks, not to do the loudness work.
Things to keep in mind
Don't swap the music to fix levels. Gain and limiting change levels, not content. If a platform raises a rights question, that is not something a filter can answer.
Keep video untouched.
-c:v copyavoids a generation loss on the picture.Leave headroom. -1 dBTP is a common ceiling; -1.5 to -2 dBTP gives extra safety for platforms that re-encode at low bitrates.
Check by ear. A limiter working too hard pumps. If you hear it, lower the gain before the limiter instead of pushing the limit lower.
A last note on the example: the effect page states "This is an independent AI effect and is not affiliated with Drake."
Disclosure: written by the MixVio team with AI assistance; the example video was made with MixVio's Burning Bridges AI effect from an AI-generated portrait.